Saturday, June 12, 2010

Produce Stories, Parts 1 & 2

One blog that I enjoy reading is called Produce Stories.  I stumbled across it while looking for strawberry jam recipes that used agave nectar. It is what helped me make my own jam! I don't know anything about the author other than that she posts about what she buys at a farmer's market and host much it is (amongst other things). It gave me the idea that I should post my finds!

The Webster Groves Farmer's Market opened last week. I really enjoy it! It has some awesome finds. Last week, amongst other things, I bought some water lilies (that are now blooming), some homemade lip balm, and a lined produce basket (to collect my garden's harvest in!). This week, here was my take:


1 Dozen Eggs - $3
Squash (2 Italian zucchini, 2 patty pan)- $4.50
Homemade, fresh Lemon-Pepper pasta - $3.50
1/2 Pound Fiddleheads- $7
TOTAL - $18


I was REALLY excited when I saw the fiddleheads. I read about them in Sauce Magazine (a local food magazine) a couple months ago. They are locally picked - not something you grow in a garden. The guy hunts them in the "wild" then sells them. Tomorrow I'll prepare them and let you know how they are!

I also went to a local produce stand called Roger's. They have the CHEAPEST produce there! Here was my haul:


- 1 large canteloupe
- 3 ears corn
- 1 pint blueberries
- 2 peaches
- 2 avocados
- 1 large sweet potato
TOTAL: $8.28!!!!

I told you it was cheap!!

Thursday, June 3, 2010

Raspberry Adventures!

Lakeview Farms, take two! After being turned away so early last Saturday and not being able to pick, I decided I would attempt to drag myself out of bed early one day this week to go try to pick again. Wednesday morning, I did just that! Anyone who knows me know that getting up at 7am is difficult. Even on a work day. But I did it!

Arriving at the farm, I noticed it wasn't too busy. Score! One cool thing about this farm is that instead of going on a picking free for all, they give you your own area to pick in. That way, no one is infringing upon your territory and they can keep track of where has been picked over so the next person who comes to pick goes in an area with riper, not yet picked berries. That's a good model in my mind!

I started picking. The pickings were great! Lots of ripe berries to choose from. I really dug in there to get good ones. Raspberry bushes are prickly so it got a bit uncomfortable, but was worth it!
In no time, I had filled up several containers.
Looking to the west, the sky was ominous. I started picking like mad, worried that the skies might unleash upon me at any minute. People started fleeing to their cars. Dangit, I was going to fill all of my containers. If I got a little wet, it wouldn't do me any harm. I finished just as the sky looked like this:
I wanted to strawberry pick, but the lady where I paid said they would probably close so I decided to leave. I ended up with 8 containers. Total cost? $15.
Yummy, yummy berries! This much would've cost $24-36 at a store! So what did I do? I turned these into this:
And this:
DELISH!

To make the jam, I used 6 containers, about 1 cup of agave nectar, juice of 1 lemon, and a squirt of honey. Used my immersion blender (what a handy tool!!) and boiled it for about 30 minutes. Then followed standard canning procedures. I saved a cup of jam to make the raspberry oatmeal bars. Here is the recipe I used. It turned out great!! And I feel good that I hand picked the raspberries at a local farm and turned it into these yummy treats. I might go again tomorrow. I'm addicted!!

Samosas!


I've become addicted to reading a couple different blogs, and a couple of them are about food. Sometimes I get ideas from blogs, or sometimes I just have an ingredient or idea and Google it and get a bunch of different recipe ideas. My two favorite food blogs are:

- Fed Up with School Lunch: A blog written by an anonymous teacher who is eating the school meal every day for a year to raise awareness for how the nutrition lacks in them. She posts pics and comments about the lunches (which look way worse than our school lunches, but ours aren't very nutritious either) and has a lot of guest bloggers. It's a fascinating topic. As I'm on a healthier kick now and really shunning artificial ingredients like high fructose corn syrup, it's amazing to see what "nutrition" is to the institution that serves kids. How something like tater tots or corn chips satisfies their requirement of a veggie for the day. Yuck!

- BentoLunch Adventures (What's for Lunch at Our House): A blog I discovered through the Fed Up blog. A mom who makes INSANELY ARTISTIC lunches for her kids. You have to see it to believe it. And it's healthy! She also posts a lot of recipes. Which brings me to...

SAMOSAS!

These Indian dumplings are yummy.. and with me being off of work this week, I was feeling rather housewife-ish. So I decided to take the recipe, tailor it to my tastes, and make samosas for dinner.

Ingredients:
2 Yukon Gold baking potatoes
Peas (frozen)
Garlic (2 cloves or so)
Onions (I don't like them, so just used about a quarter of one for flavor)
Olive Oil
Paneer (Indian Cheese)
Curry Powder
Fillo Dough

You can really put ANYTHING you want inside it. Add or subtract what you want!

Here's how I did it:
1. Peel potatoes, cut into small cubes. Boil for about 20 minutes- until soft but not falling apart. Drain.

2. Chop onions and garlic. Sautee in olive oil for about 5 minutes (until they are getting soft).

3. Add about 2-3 tablespoons of curry powder to mixture. Stir to coat.
4. Pour cooked potatoes and peas into the mixture. Stir well to coat with curry powder. Add a little more if needed. (Note, I didn't thaw the peas much. They cooked enough on the stovetop then in the oven.) Cook for 5-10 minutes to absorb flavor. Set to the side.

5. Spread fillo dough out on the counter so the longest side is at the top and bottom. Fold it over into thirds, then turn to "hotdog" position (longest side at top and bottom again).
6. Spoon some of the mixture into the bottom left corner. I added 2 cubes of paneer (which was frozen) at this point. Then fold the corner up so it's a triangle.
Note that my folded fillo is sitting on top of non folded sheets here.
7. Fold down to a triangle again. You will get basically 3 folds and then have a little left over on the end. At this point, get a little water and bush it on the remaining strip of dough. Fold over and stick to the triangle. This seals it. It took me a couple tries to get the folding part. Check out this website for better pictures and instructions.
8. Put on cookie sheet and bake at 375 for about 6-8 minutes, flip over and bake on the other side for the same or until golden brown.
9. EAT! I served it with an Indian masala sauce for dipping!

Monday, May 31, 2010

Strawberry Jam Canning Session!


Saturday morning, I woke up early (7am), which is very uncharacteristic of me. Anyone who knows me knows that I LOVE sleep and sleeping in! Why the motivation, you ask? Strawberry picking! I decided to go to Lakeview Farms, pretty much the only place within 45 minutes where I could find (non-blackberry) berry picking. A couple girls from Yelp met me at my place at 7:30am and we headed off after enjoying some delicious bagels.

I had done extensive research on the farm before going, and decided to go that early so they wouldn't run out of berries. I also called the day before, which they said to do to make sure there was still picking. There was.

We finally were nearing the entrance and drive up, only to see a sign that says "Sorry, we are closed" in the entrance. WTF? We pulled over and called and they were already picked out! BUMMER. We had to turn around.

Now, I had my mind SET on making jam/preserves that day. So I cheated and bought some strawberries from a local produce stand and got started!

I wanted to go chemical free and sugar free, so I found a great recipe on the internet using agave nectar instead of sugar. Here is my ingredient list:

- 3lbs Strawberries
- 2-3Lemons
- 1/2 cup Agave Nectar
- Squirt of Honey
- 1 Apple


I also bought a water bath canner and many jars to preserve my stuff from this season in:


Here are the steps I took:

1. Sterilize five 1/2-pint jars by boiling them in a hot water bath for five minutes or so.
2. Wash and stem strawberries.
3. Put strawberries in a bowl.
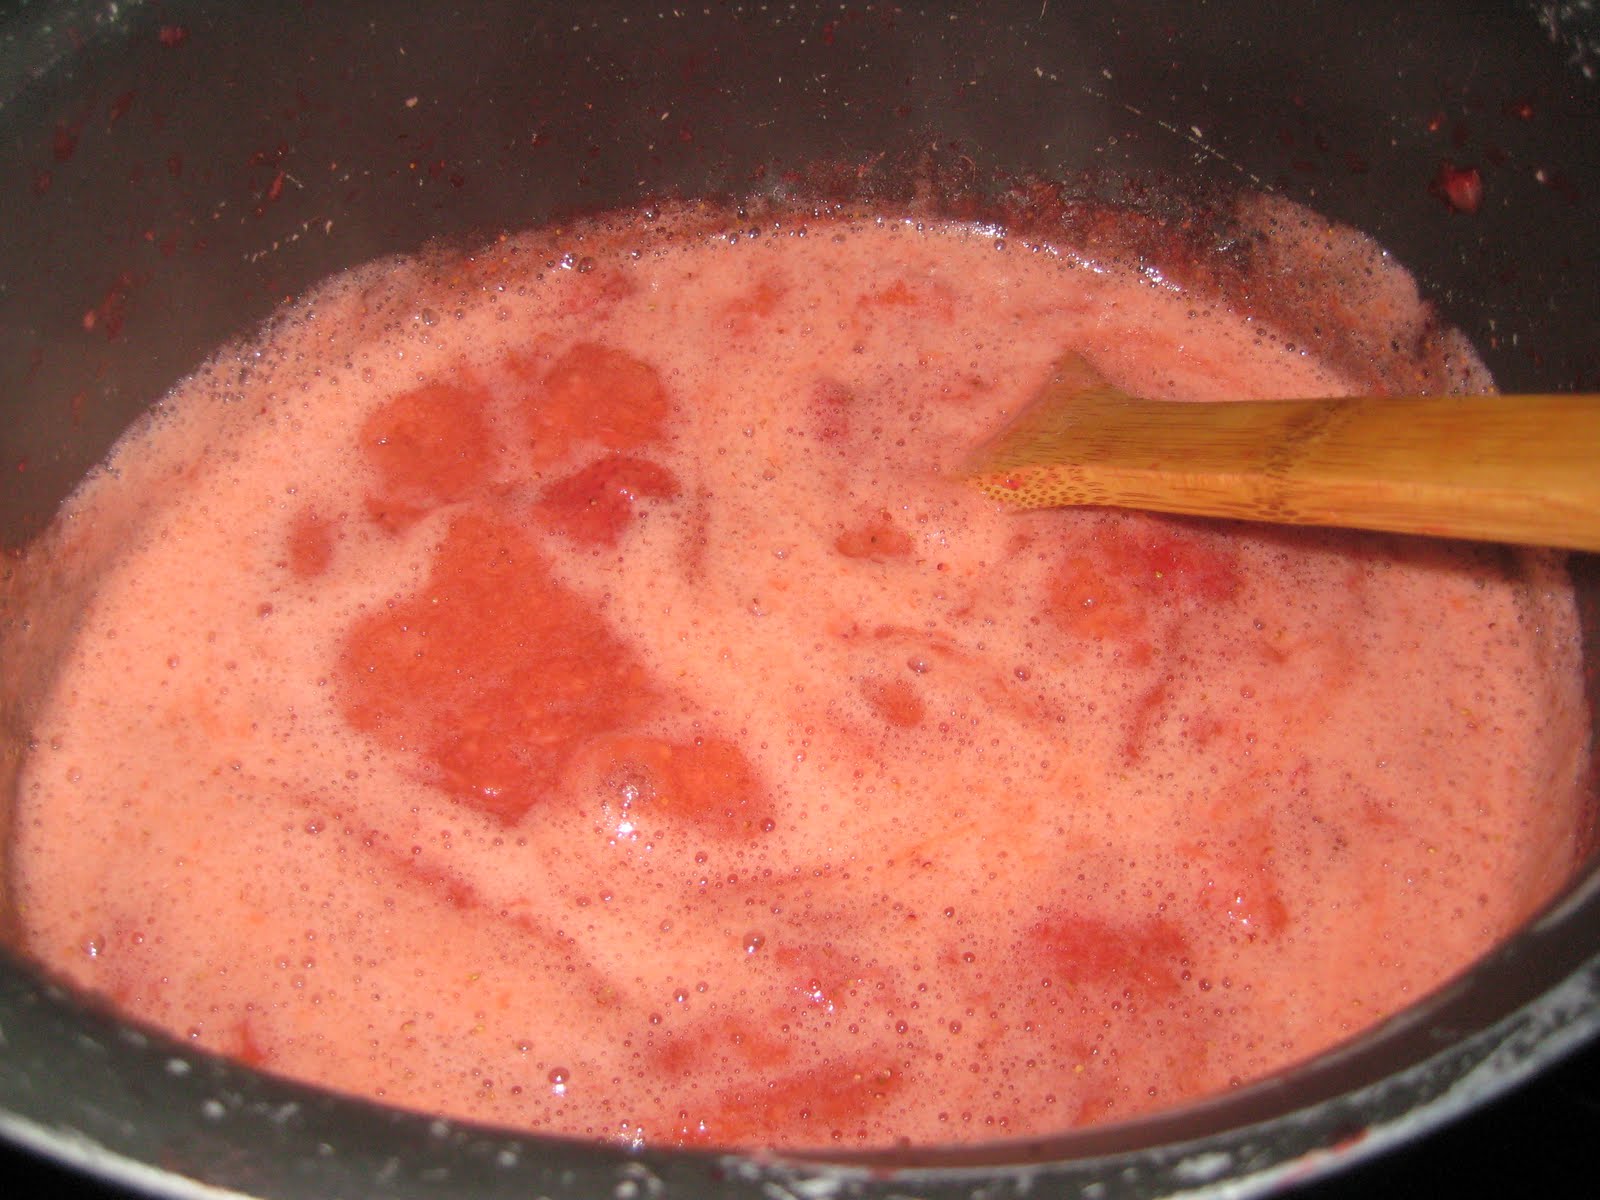
4. Stir berries, lemon juice (start with 2 lemons, adjust to taste), agave nectar, and grated apple together in a pot over medium-high heat.
5. You can mash the mixture with a potato masher, but I decided to use my immersion blender to get it more liquified but still with some chunks.

6. Bring to a full, rolling boil and boil at least 10 minutes, or up to 15 minutes. Adjust sweetener to taste after 5 minutes and again after 10 minutes. To test for jelling, put a white plate in the freezer when you start cooking the jam; when ready to test, put a teaspoon of jam liquid on the plate, and return to freezer for one minute. You should be able to make a line in the jam with your finger that doesn't fill back in at all. Mine did after awhile but I don't mind a little liquid!
7. Remove a jar from the water, ladle hot fruit mixture into jar leaving 1/4" headspace, wipe threaded rim of jar clean, and attach lid and band. Repeat until all jars are full. I had EXACTLY enough to fill 5 half pint jars.

8. Process in a boiling water bath for 5-10 minutes. Leave undisturbed overnight or until completely cool.

9. TIP: Being a canning rookie, I wasn't sure if the seals were properly sealed when I pulled out the cans. After about 10 minutes, they all popped and were definitely concave!

Monday, May 24, 2010

New Obsession + My first Harvest!

New kitchen toys are finding their way to my cocina!

It's Ben's fault... he started it by surprising me back in March with an awesome new Kitchenaid mixer. The kind that mixes on its own, has many attachments, and has a bowl that comes with it. It's pretty much totally fabulous.

I've just added a couple more things to my kitchen repertoire. First, a food processor. My first goal: to make pesto with the abundant basil I have growing.

Second, a canning kit. Which leads me to my new obsession! CANNING! My next kitchen gadget will be a water bath canner. This weekend, I'm heading to Lakeview Farms to pick strawberries and raspberries. Then I'm having a canning party! Do I have much of an idea of what I'm doing? NOPERS! But I don't care. I'm gonna give it my best shot! Stay tuned for how it turned out...


On another note, yesterday I harvested my first item for consumption: lettuce! I made a delicious salad with it.

Home grown, organic lettuce. Plus some other stuff (not so organic or home grown!)

Paired with some Dr. Praeger's veggie burgers (the only ones that I will eat) and some Trader Joe's sweet potato fries (TO.DIE.FOR), it made the perfect warm weather meal!

These sweet potato fries are THE BOMB!

The garden is growing like mad - way bigger than in the last pictures even. I haven't complained about how much rain we've had because it's been beautiful for my garden. While weeding the other day, I realized that I have a small berry patch growing that I DIDN'T PLANT! Crazy. My squash is blossoming like mad and I even have fruit on one of the plant. Can't wait til the squash starts coming - we'll be up in our ears with it! Want some? Come on by!

Wednesday, May 19, 2010

Garden Update

My garden is finally in the ground!

I know it's been awhile since I updated but it's been busy. Some new things going on in my life are: my teaching assignment has changed (next year I'm at one school full time, YAY!), I started a gym regimen and got a personal trainer, and I've done a little traveling (Florida for pleasure, Columbia MO and Minneapolis for teaching related things).

Now, my energy is going towards gardening. It's been a slow go because the weather has been bad (2 weekends of tornadoes and big rains, and a couple weeks of fluctuating temperatures, some frost creating) but it looks like we're safe now!

I realized how many flower beds I have. WHOA. Lots of planting to do. I'm focusing on planting perennials in many of them for lower maintenance future Springs and then fruits and veggies in a couple places. Ben and I spent quite a bit of time raking all of the twigs and branches that fell during the winter. Ben got our new lawn mower up and running. It's awesome! It's called the Fiskars Momentum. It's made by Fiskars, which makes scissors. It's a reel mower- so not electric or gas. It appealed to us because of our "green" ideas and Ben thought he could use his muscle to propel it. He really likes it and it does a great job so far! I figure that it saves the environment and will only need some money put in each year or so to sharpen the blades, instead of the money we'd spend on gas or electric power.

My first projects were the bed in the front, in which I planted marigolds, and the large back bed by the pond. I have always wanted lilacs, so I bought two bushes to put there plus 3 little flowering bushes called magic carpet spirea.


We also have a lot of roses blooming. They were blooming when we moved in so I would imagine that they bloom all summer!


I ended up planting some of the things that I originally mentioned but the list is longer and more different! Ben's dad built me a raised bed, and I planted several things there, along with around the perimeter (he also brought his roto tiller and tilled it all!). I also expanded to inside the fence and have plans on tilling a little more later this season or maybe next year to make more space.


This is what I planted:

-Tomatoes (4 varieties)
-Green beans
-Lettuce (2 varieties)
-Broccoli
-Cauliflower
-Sweet red peppers
-Brussels sprouts
-Melon (canteloupe)
-Summer squash
-Zucchini
-Butternut squash
-Acorn squash
-Summer medley squash (comes in yellow, green, orange)
-Sweet lightening - an "in between" summer and winter squash
-Raspberries
-Strawberries (2 varieties)

I'm going to have A LOT of squash!


I also have many herbs:

-Rosemary (2 varieties)
-Mint (didn't plant it- it was there and is invading!)
-Lemon thyme
-Chives
-Sage
-Chamomile
-Oregano
-Summer Savory
-Parsley
-Basil - loads of it!
-Dill

I know I'm missing something here!

Just got a food processor and canning supplies, so I plan on being busy this summer. I will blog more as I do it- will have more time then!

Sunday, March 14, 2010

Catching up/New Creations

I've been so busy lately that I haven't updated the blog. Between my second teaching job, finals, giving two big presentations at a conference in Minneapolis and starting a garden, I have just started trying some new things in the kitchen. Look for the garden update later this week.

Since I am starting a garden, I need to be able to prepare the veggies I'm growing to my liking. One thing I'm attempting is Brussels sprouts. I've really only eaten them about 3 times in my life, all being deliciously prepared. Two times Ron made them on special occasions and the other time I had them at Niche (for non STLers, it's a very upscale restaurant that is very "hot" right now). Don't ask me why I decided to grow them. Just sounded interesting. Anyhow, I bought some and prepared them and now they are my new favorite veggie! Ben also gives them 5 stars and even asks for more. I definitely think they get a bad rep. Anyhow, my first try at them, I just sauteed them with some butter until they were nice and caramelized. I also made squash (summer and zucchini) risotto with barley instead of rice, which worked out really well. I know I need to work on my presentation, but here is my finished product:


Tonight I decided to make risotto again since it turned out so well the first time. This time I put broccoli and Brussels sprouts in it.


While I was chopping veggies, I noticed that my dog Ruby was nowhere to be seen. Whenever I'm cooking and she isn't there, I know she is getting into SOMETHING. So I walk into the living room and realize that she is playing with something green. And she doesn't have a green toy. Hmmm. Turned out that she really likes broccoli!


Making the risotto was the second thing I thought to make. The first thing was beer bread, which my friend Brooke gave me a recipe for a month or so ago. I had asked for it because she made it at Mardi Gras 2009 and I remember it being delicious. I was a little nervous that I wouldn't like it as much considering things usually seem to taste better when tipsy, which I was when I had it at Brooke's. Anyhow, I followed the directions and this is what I came up with:


The bread was warm and soft and delicious! The whole meal looked like this and was freaking awesome.